在试验这个示例时,我们一共进行了5次操作:
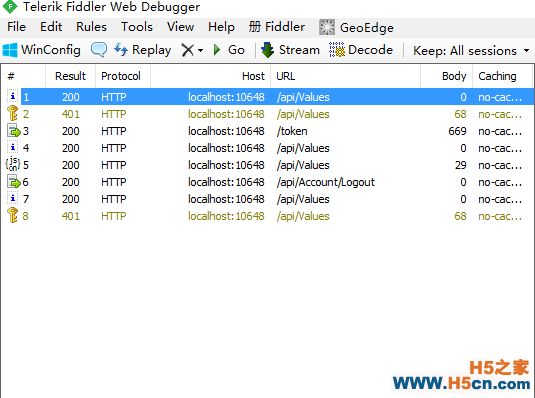
有人可能会注意到,为什么每次点击[调用API]按钮,都发起了两次请求?
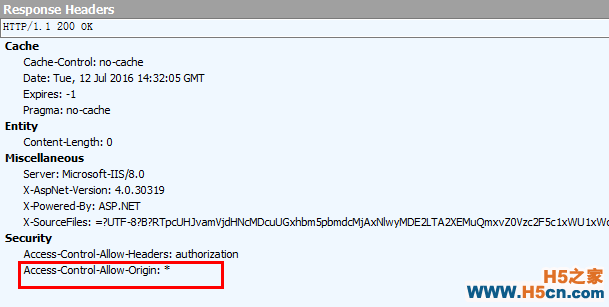
这是因为当浏览器发送跨域请求时,浏览器都会先发送一个OPTIONS预请求(preflight request)给目标站点,用于确认目标站点是否接受跨域请求,如果目标站点不支持跨域请求,浏览器会提示错误:
No 'Access-Control-Allow-Origin' header is present on the requested resource.
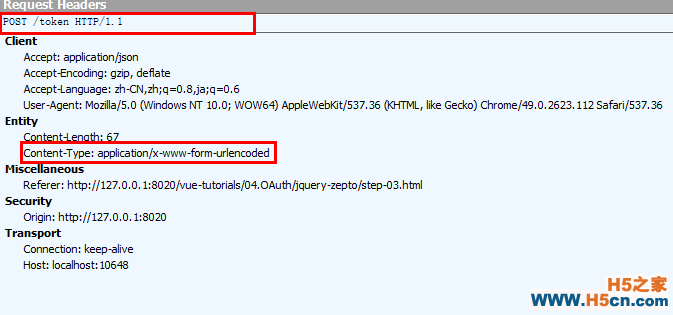
如果是POST请求,且数据类型(Content-Type)是 application/x-www-form-urlencoded,multipart/form-data 或 text/plain中的一种,则浏览器不会发送预请求,上图的/token请求就是满足该条件的。
zepto会自动将非GET请求的Content-Type设置为application/x-www-form-urlencoded:
if (settings.contentType || (settings.contentType !== false && settings.data && settings.type.toUpperCase() != 'GET'))
setHeader('Content-Type', settings.contentType || 'application/x-www-form-urlencoded')
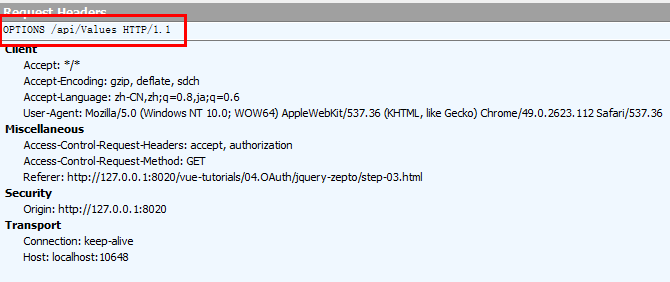
我们还是通过Fidder看一下第1次/api/Values请求和响应的Headers信息
请求的Headers信息,它是一次OPTIONS请求。
响应的Headers信息,Access-Control-Allow-Origin: *表示允许所有外部站点对目标站点发送跨域请求。
更多CORS的知识,请参考MDN上的说明:
https://developer.mozilla.org/zh-CN/docs/Web/HTTP/Access_control_CORS
基于vue-resource实现这3项功能时,沿用上面的HTML代码。
注册更为简洁的register方法:
register: function() { this.$http.post(this.registerUrl, this.registerModel) .then((response) => { this.msg = '注册成功!' }).catch((response) => { this.msg = response.json() }) }View Demo
注意:当使用vue-resource发送注册的POST请求时,Fiddler捕获到了2次请求,第1次是由浏览器发送的OPTIONS预请求,第2次才是实际的POST请求。这和使用$.ajax时是不一样的,因为$.ajax会将非GET请求的Content-Type设置为application/x-www-form-urlencoded,而vue-resource发送POST请求的Content-Type为application/json;charset=UTF-8。
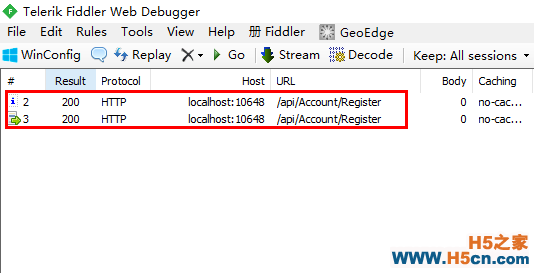
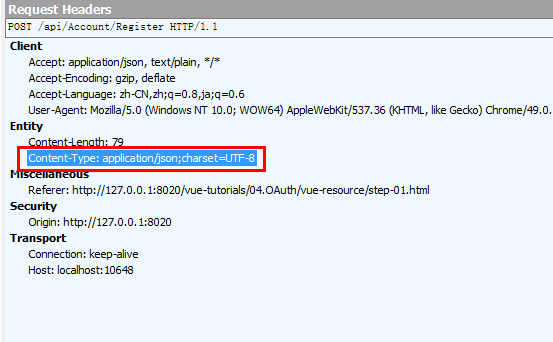
启用emulateJSON选项,可以让浏览器不发送OPTIONS预请求,有两种启用方式。
1.全局启用
Vue.http.options.emulateJSON = true2.局部启用
this.$http.post(this.registerUrl, this.registerModel ,{ emulateJSON : true}) .then( (response) => { this.msg = '注册成功!' })启用了emulateJSON选项后,使得POST请求的Content-Type变为application/x-www-form-urlencoded
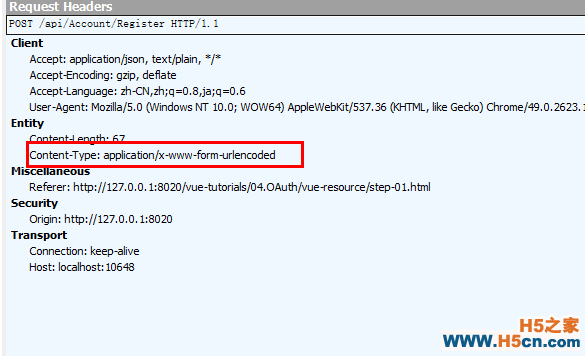
登录和注销的方法:
login: function() {
this.$http.post(this.loginUrl, this.loginModel)
.then((response) => {
var body = response.json()
this.msg = '登录成功!'
this.userName = body.userName
sessionStorage.setItem('accessToken', body.access_token)
sessionStorage.setItem('userName', body.userName)
}).catch(this.requestError)
},
logout: function() {
this.$http.post(this.logoutUrl)
.then((response) => {
this.msg = '注销成功!'
this.userName = ''
this.loginModel.username = ''
this.loginModel.password = ''
sessionStorage.removeItem('userName')
sessionStorage.removeItem('accessToken')
}).catch(this.requestError)
},
requestError: function(response) {
this.msg = response.json()
}
View Demo
API调用调用API的方法也更为简洁:
callApi: function() { var headers = {} headers.Authorization = 'Bearer ' + sessionStorage.getItem('accessToken') this.$http.get(this.apiUrl, { headers: headers }) .then((response) => { this.result = response.json() }).catch(this.requestError) }同样的,在发送请求前,需要将access token添加到请求头。
View Demo
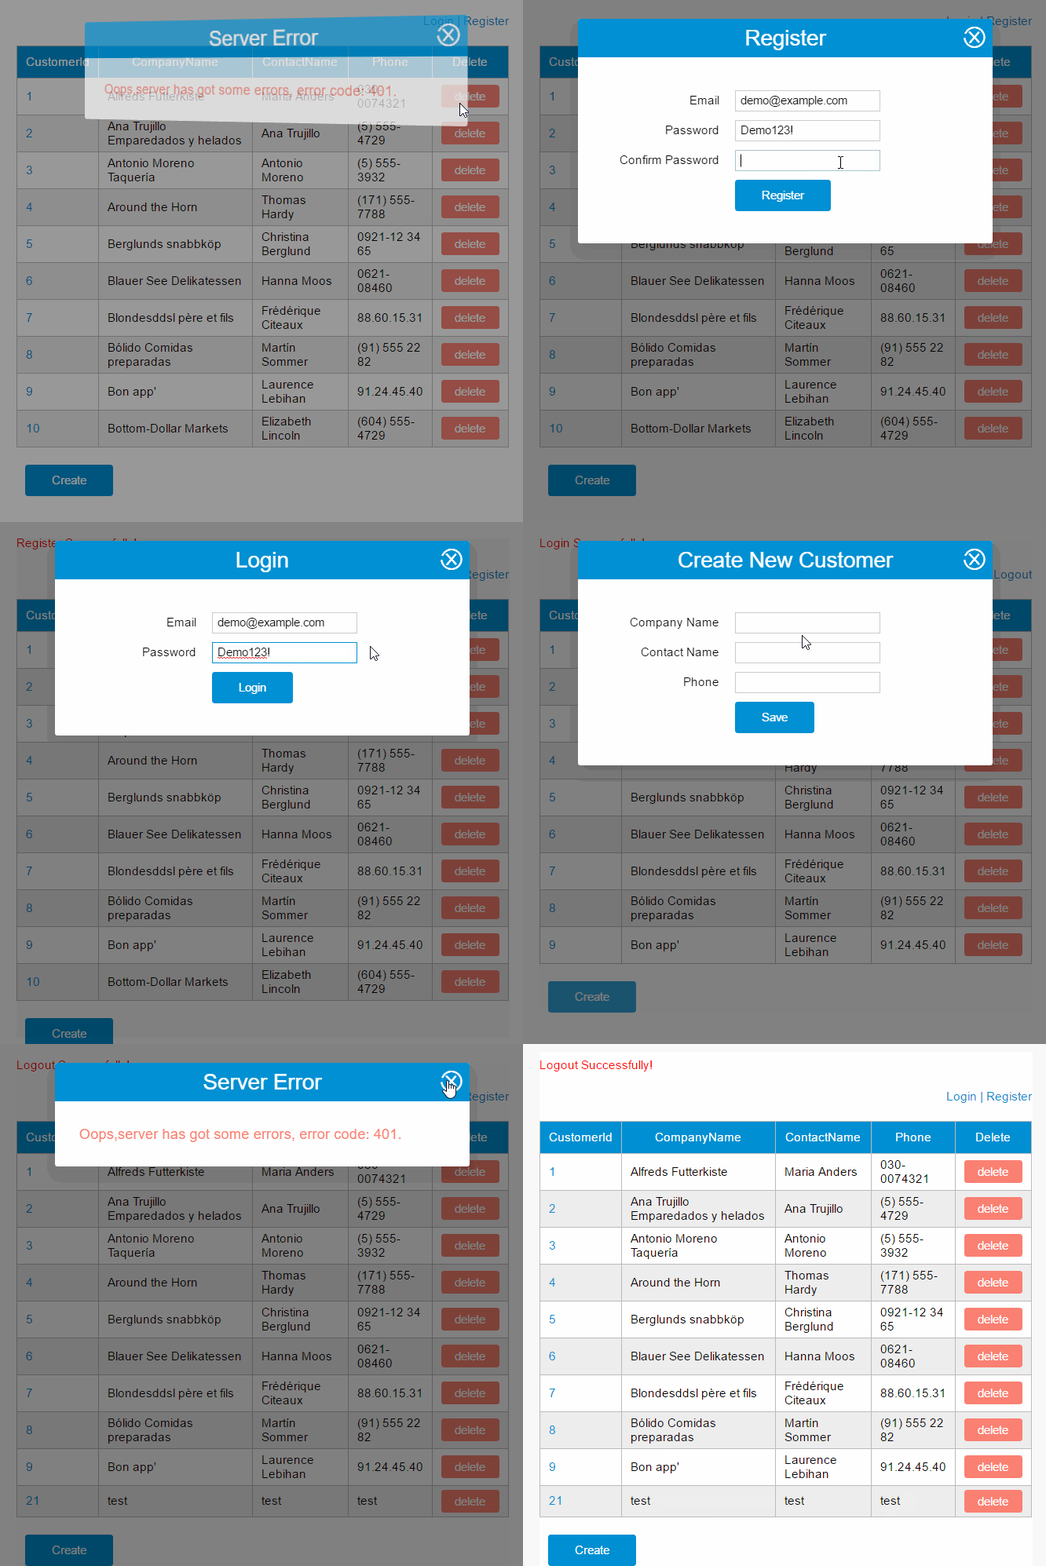
综合示例本文在准备服务端环境的时候,提供了一个CustomersController,除了GET操作,其他操作的访问都是受保护的,需要用户登录以后才能操作。
现在我们来实现这个示例, 该示例结合了上一篇的CURD示例,以及本文的注册、登录、注销功能。
具体代码我就不再贴出来了,大家结合源代码试一试吧。
View Demo
posted @
 相关文章
相关文章
 精彩导读
精彩导读 热门资讯
热门资讯 关注我们
关注我们
