前几天更新了第二篇,现在趁热打铁最后一点知识
1.1.绘制一段弧
1.2.绘制圆角矩形
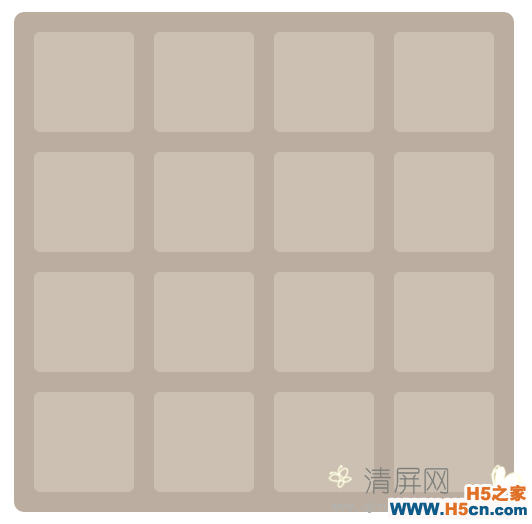
1.3.绘制一个棋盘格
2.1.用arcTo()绘制一轮弯月
2.2.将绘制的弯月挂到星空上
3.1.用二次贝塞尔曲线绘制一轮弯月
4.1.用三次贝塞尔曲线绘制草地

效果展示.png
1. 绘制弧线 1.1 绘制一段弧//在画布上创建一段圆弧: context.arc( x, y, r, start, end, [anticlockwise]) //圆心x坐标,圆心y坐标,起始角度,结束角度,是否逆时针绘制
默认情况下anticlockwise = false,即顺时针绘制
起始角度,和结束角度单位都是弧度

弧度.png
完整代码请戳Lesson3/demo1.html
window.onload = function () { var canvas = document.getElementById("canvas"); canvas.width = 1000; canvas.height = 500; var context = canvas.getContext("2d"); context.lineWidth = 5; context.strokeStyle = "#005588"; //第一行 for (var i = 0; i < 10; i++) { context.beginPath(); context.arc(50 + i * 100, 60, 40, 0, 2 * Math.PI*(i + 1) / 10); context.stroke(); } //第二行 for (var i = 0; i < 10; i++) { context.beginPath(); context.arc(50+ i * 100, 180, 40, 0, 2 * Math.PI*(i + 1) / 10); context.closePath(); context.stroke(); } //第三行 for (var i = 0; i < 10; i++) { context.beginPath(); context.arc(50 + i * 100, 300, 40, 0, 2 * Math.PI*(i + 1) / 10,true); context.stroke(); } //第四行 for (var i = 0; i < 10; i++) { context.beginPath(); context.arc(50+ i * 100, 420, 40, 0, 2 * Math.PI*(i + 1) / 10,true); context.closePath(); context.stroke(); } }

绘制弧线.png
1.2 绘制圆角矩形我们可以分为 八部分绘制 ,如果设置 左上角的圆心坐标为 (0,0) ,四个1/4圆的半径是r,那么圆心坐标如下:

圆角矩形.png
完整代码请戳Lesson3/demo2.html
window.onload = function () { var canvas = document.getElementById("canvas"); canvas.width = 800; canvas.height = 600; var context = canvas.getContext("2d"); strokeRoundRect(context, 200, 100, 300,200, 50) }; //绘制圆角矩形 function strokeRoundRect(cxt, x, y, width, height, r, lineWidth,strokeColor) { cxt.save(); cxt.translate(x, y); pathRoundRect(cxt, width, height, r); cxt.lineWidth = lineWidth || 1; cxt.strokeStyle = strokeColor || '#005588'; cxt.stroke(); cxt.restore(); } //绘制圆角矩形的路径 function pathRoundRect(cxt, width, height, r) { cxt.beginPath(); //右下的圆 cxt.arc(width - r, height - r, r, 0,Math.PI / 2); //下面的线 cxt.lineTo(r, height); //左下的圆 cxt.arc(r, height - r, r, Math.PI / 2, Math.PI); //左边的线 cxt.lineTo(0, r); //左上的圆 cxt.arc(r, r, r, Math.PI, Math.PI * 3 / 2); //上边的线 cxt.lineTo(width - r, 0); //右上的圆 cxt.arc(width - r, r, r, Math.PI * 3 / 2, Math.PI * 2); //右边的线,用closePath来首尾连接 cxt.closePath(); } 1.3 绘制一个棋盘格完整代码请戳Lesson3/demo3.html
window.onload = function () { var canvas = document.getElementById("canvas"); canvas.width = 1000; canvas.height = 600; var context = canvas.getContext("2d"); //先填充一个大的圆角矩形 fillRoundRect(context, 150, 50, 500,500, 10, "#bbada0"); //在填充4行4列的小圆角矩形 for(var i = 0; i< 4;i++) { for(j = 0;j< 4;j++) { fillRoundRect(context, 170+i*120, 70+j*120, 100,100, 6, "#ccc0b3"); } } }; //填充圆角矩形 function fillRoundRect(cxt, x, y, width, height, r, fillColor) { cxt.save(); cxt.translate(x, y); pathRoundRect(cxt, width, height, r); cxt.fillStyle = fillColor || '#005588'; cxt.fill(); cxt.restore(); } //绘制圆角矩形的路径 function pathRoundRect(cxt, width, height, r) { cxt.beginPath(); //右下 cxt.arc(width - r, height - r, r, 0,Math.PI / 2); //下面 cxt.lineTo(r, height); //左下 cxt.arc(r, height - r, r, Math.PI / 2, Math.PI); //左边 cxt.lineTo(0, r); //左上 cxt.arc(r, r, r, Math.PI, Math.PI * 3 / 2); //上边 cxt.lineTo(width - r, 0); //右上 cxt.arc(width - r, r, r, Math.PI * 3 / 2, Math.PI * 2); //右边 cxt.closePath(); }

 相关文章
相关文章


 精彩导读
精彩导读 热门资讯
热门资讯 关注我们
关注我们
