这里的xLen是两个接触点x坐标差的绝对值,yLen相应的就是y坐标差的绝对值。
_onTouchStart(e)%20{ %20%20if(e.touches.length%20>%201)%20{ %20%20%20%20let%20point1%20=%20e.touches[0]; %20%20%20%20let%20point2%20=%20e.touches[1]; %20%20%20%20let%20xLen%20=%20Math.abs(point2.pageX%20-%20point1.pageX); %20%20%20%20let%20yLen%20=%20Math.abs(point2.pageY%20-%20point1.pageY); %20%20%20%20this.touchDistance%20=%20this._getDistance(xLen,%20yLen); %20%20}%20else%20{ %20%20%20%20... %20%20} }在_onTouchStart函数中获取并且保存%20touchstart%20发生时两个接触点之间的距离。
_onTouchMove(e)%20{ %20%20if(e.touches.length%20>%201)%20{ %20%20%20%20%20%20let%20xLen%20=%20Math.abs(e.touches[0].pageX%20-%20e.touches[1].pageX); %20%20%20%20%20%20let%20yLen%20=%20Math.abs(e.touches[1].pageY%20-%20e.touches[1].pageY); %20%20%20%20%20%20let%20touchDistance%20=%20this._getDistance(xLen,yLen); %20%20%20%20%20%20if(this.touchDistance)%20{ %20%20%20%20%20%20%20%20let%20pinchScale%20=%20touchDistance%20/%20this.touchDistance; %20%20%20%20%20%20%20%20%20%20this._emitEvent('onPinch',{scale:pinchScale%20-%20this.previousPinchScale}); %20%20%20%20%20%20%20%20%20%20this.previousPinchScale%20=%20pinchScale; %20%20%20%20%20%20} %20%20}else%20{ %20%20%20%20... %20%20} } 旋转(rotate)旋转手势需要检测两个比较重要的值,一是旋转的角度,二是旋转的方向(顺时针或逆时针)。%20其中旋转角度和方向的计算需要通过向量的计算来获取,本文不再展开,感兴趣的同学可以查看这里。
首先,需要获取向量的旋转方向和角度
//这两个方法属于向量计算,具体原理请阅读本文最后的参考文献 _getRotateDirection(vector1,vector2) { return vector1.x * vector2.y - vector2.x * vector1.y; } _getRotateAngle(vector1,vector2) { let direction = this._getRotateDirection(vector1,vector2); direction = direction > 0 ? -1 : 1; let len1 = this._getDistance(vector1.x,vector1.y); let len2 = this._getDistance(vector2.x,vector2.y); let mr = len1 * len2; if(mr === 0) return 0; let dot = vector1.x * vector2.x + vector1.y * vector2.y; let r = dot / mr; if(r > 1) r = 1; if(r < -1) r = -1; return Math.acos(r) * direction * 180 / Math.PI; }然后,我们在手指发生移动时,调用获取旋转方向和角度的方法。
_onTouchStart(e) { ... if(e.touches.length > 1) { this.touchVector = { x: point2.pageX - this.startX, y: point2.pageY - this.startY }; } ... } _onTouchMove(e) { ... if(this.touchVector) { let vector = { x: e.touches[1].pageX - e.touches[0].pageX, y: e.touches[1].pageY - e.touches[0].pageY }; let angle = this._getRotateAngle(vector,this.touchVector); this._emitEvent('onRotate',{ angle }); this.touchVector.x = vector.x; this.touchVector.y = vector.y; } ... } 实战好了,我们的手势系统到这里就完成了。接下来要在实战中检验这套系统是否可靠,做一个简单的图片浏览器,支持图片缩放,旋转,移动,长按。 首先,做好dom规划,和[之前]一样,我们的事件监听机制并不直接作用在图片上,而是作用在图片的父组件上。

然后,可以开始使用上面的手势检测系统了。
render() { return ( <Gestures onPinch={this.onPinch} onMove={this.onMove} onRotate={this.onRotate} onDoubleTap={this.onDoubleTap} onLongPress={this.onLongPress}> <div className="wrapper" > <img src="?imageMogr2/auto-orient/strip%7CimageView2/2/w/1240" /> </div> </Gestures> ); }由于我们的手势系统检测的增量,因此不能直接把增量应用在对象上,而是需要把这些增量累加。以旋转为例:
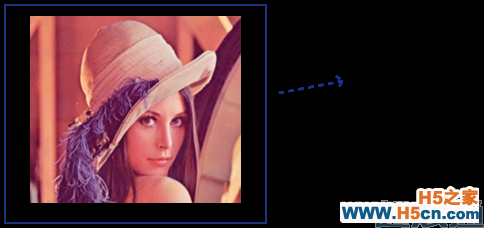
onRotate(event) { //对增量进行累加 this.angle += event.angle this.setState({ angle:this.angle }); }至此,我们的手势检测就完成了:
 相关文章
相关文章

 精彩导读
精彩导读 热门资讯
热门资讯 关注我们
关注我们
