Windows Phone 7之画图
在Android 我们需要在屏幕画图,或扩展SurfaceView 或扩展父类View 在OnDraw()里面使用画板和调色笔画画。而在微软的强大封装下,这种画图的试成为了控件的可能,微软将众多日常必要的画图都以控件展示,开发人员则无须过多学习使用Paint 、使用Canvas 等画图知识就能轻松在WP7 手机上画各种图,不过这种灵活性是否会降低呢?这个姑且不深究。
今天学习的WP7 画图控件有以下几种:
InkPresenter 可否单纯理解为画图面板?
Path 路径
Ellipse 圆形或椭圆形
Rectangle 矩形,方块矩形或圆角矩形
Line 直线
Polygon 封闭多边形
Polyline 开放多边形
1.InkPresenter 实现方式:
为其添加三个事件监听,实现其按下到离开的画图路径:
以下是代码片段:
<InkPresenter Background="White" LostMouseCapture="inkPresenter1_LostMouseCapture" MouseLeftButtonDown="inkPresenter1_MouseLeftButtonDown" MouseMove="inkPresenter1_MouseMove" HorizontalAlignment="Left" Margin="24,25,0,0" VerticalAlignment="Top" />
监听内部实现代码都有添加注释,代码如下:
以下是代码片段:
public partial class InkPresenterPage : PhoneApplicationPage
{
//从手指落下到抬起就称为一个Stroke
Stroke mStroke;
public InkPresenterPage()
{
InitializeComponent();
}
private void inkPresenter1_MouseLeftButtonDown(object sender, MouseButtonEventArgs e)
{
//捕捉按下动作
inkPresenter1.CaptureMouse();
//一个按下触发的动作为stroke ,对于这些stroke 的点为stylusPoint,故要创建一个集合的点
StylusPointCollection spc = new StylusPointCollection();
//从inkPresenter 中得到每个stylusPoint 并添加到集合里面
spc.Add(e.StylusDevice.GetStylusPoints(inkPresenter1));
//实例化一个stroke到inkPresenter里面
mStroke = new Stroke();
//将stroke 添加
this.inkPresenter1.Strokes.Add(mStroke);
}
/// <summary>
/// 当手指移动时,将styluspoint 存进stroke
/// </summary>
/// <param></param>
/// <param></param>
private void inkPresenter1_MouseMove(object sender, MouseEventArgs e)
{
if (mStroke!=null)
{
mStroke.StylusPoints.Add(e.StylusDevice.GetStylusPoints(inkPresenter1));
}
}
/// <summary>
/// 当弹起时重新初始化stroke 为null
/// </summary>
/// <param></param>
/// <param></param>
private void inkPresenter1_LostMouseCapture(object sender, MouseEventArgs e)
{
mStroke = null;
}
/// <summary>
/// 清空inkPresenter里面的Stroke
/// </summary>
/// <param></param>
/// <param></param>
private void button1_Click(object sender, RoutedEventArgs e)
{
this.inkPresenter1.Strokes.Clear();
}
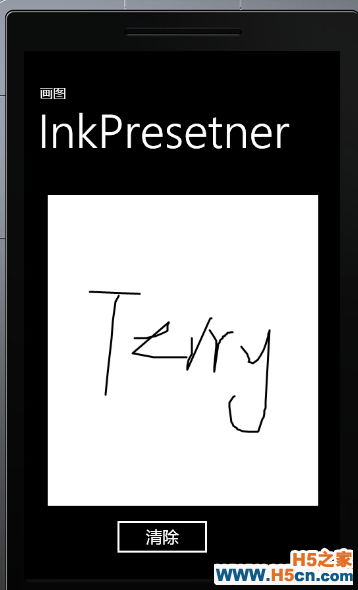
最终实现效果:

责任编辑:失落的羽毛
 相关文章
相关文章
 精彩导读
精彩导读 热门资讯
热门资讯 关注我们
关注我们
